The Impossible Triangle!

You will need:
- A4 sheet of paper
- Lead pencil
- Eraser
- Art liner
- Ruler
- Sharpener

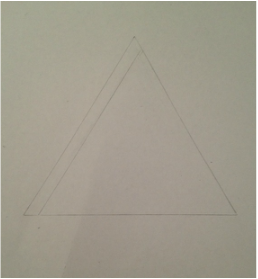
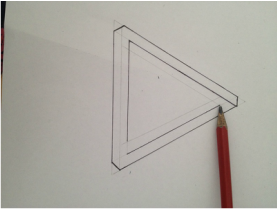
Step 1:
Using a lead pencil, draw the shape of a triangle. Do not make it too large or too small.
The triangle shown in this photo is a perfect size for your illusion.
(10cm edges)
Using a lead pencil, draw the shape of a triangle. Do not make it too large or too small.
The triangle shown in this photo is a perfect size for your illusion.
(10cm edges)
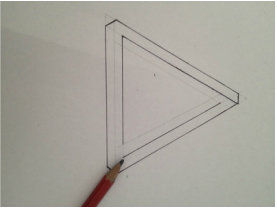
Step 2:
Draw a line on the inside of the triangle as shown.
Make sure this line is evenly proportioned and is not too thick or too thin.
Draw a line on the inside of the triangle as shown.
Make sure this line is evenly proportioned and is not too thick or too thin.
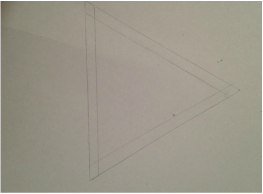
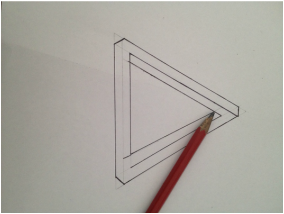
Step 3:
Repeat step 2 on each edge as shown.
Repeat step 2 on each edge as shown.

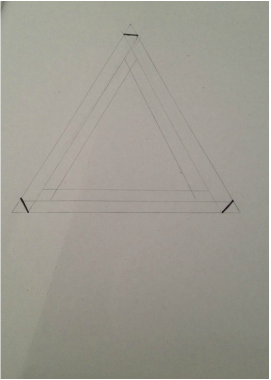
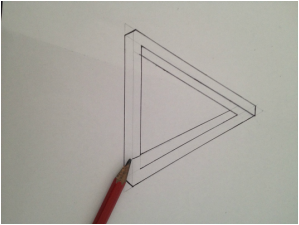
Step 4:
On the inside triangle, draw the same lines once again as shown.
Make sure the lines on the inside triangle do not intersect with the lines drawn previously.
On the inside triangle, draw the same lines once again as shown.
Make sure the lines on the inside triangle do not intersect with the lines drawn previously.

Step 5:
Repeat step 4 on the two remaining edges of the inside triangle as shown.
Repeat step 4 on the two remaining edges of the inside triangle as shown.

Step 6:
Now, on every corner of the outside triangle draw a line dividing it in half as shown.
Now, on every corner of the outside triangle draw a line dividing it in half as shown.

Your triangle should now look like this.
Step 7:
Using an art line (or fine liner) outline the corner lines drawn in the previous step.
Using an art line (or fine liner) outline the corner lines drawn in the previous step.
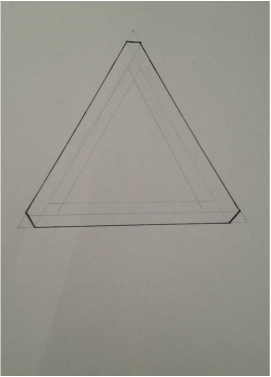
Step 8:
Outline the outside triangle as shown.
Outline the outside triangle as shown.
The next few steps will be quite difficult to explain, so use the photos as a guide.
Apologies in advance for vague instructions, it is hard to explain as for why pictures are provided.
Apologies in advance for vague instructions, it is hard to explain as for why pictures are provided.

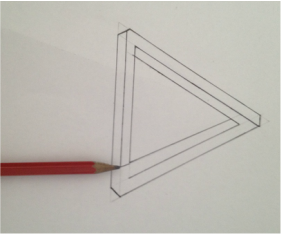
Step 9:
Outline the line shown, from the bottom right to the first line it meets. |

|

Step 10:
Outline from where the last line ended to the line it first meets. |

|
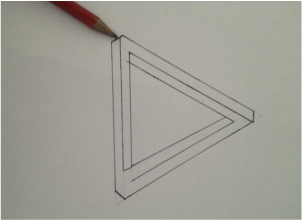
Step 11:
Outline the line shown. + When drawing this line, the second photograph stops the line early, it should continue until it meets the corner's edge. |
|

Step 12:
Outline from the end of the previous line, to the line it first meets. |

|
Step 13:
>> |
|
Step 14:
From the ending of the previous line, outline to the very top of the triangle. |
|
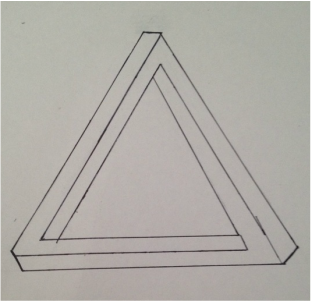
Step 15:
Using an eraser, erase all remaining pencil lines and your finished product should look like this.
- If you are looking for a more illusionary effect on your impossible triangle,
check out our drawing tips on how to shade by clicking the photograph on the right
or using the navigation tool at the very top of the page.
